An electronic water heater only uses energy when the heater or a boiler calls for heat, making it so helpful in saving energy. Their gas systems do not use thermocouples or thermopiles to prove the flame. When the flame proves, this electronic ignition system immediately turns the gas to the burners. Once this is done, the pilot light then lights the main burner.
The electronic ignition may sometimes not function accordingly; for example, a water heater might not work. It does not mark the end of the electronic ignition water heater when such occurs as it can be repaired. On repairing the water heater, utmost care must be taken since you are handling an electrical appliance. The article below outlines several tips that will help you fix or repair an electronic ignition that won’t light.
Table of Contents
Circumstances under which electronic ignition water heaters may fail to light
There are several reasons as to why the water heater may fail to work. Some of the most common reasons are;
- There could be a loose wire among the connected wires
- An incorrect voltage where the ignition does not get a correct voltage
- It could be a lousy thermocouple that is more advanced
- lights just once. Some may need to try lighting several times and later light and work effectively.
- A bad control valve
Main types of electronic ignition water heaters
1. The induced draft water heater
This type of water heater uses a small fan to fetch the combustion gas from the combustion chamber. This type of heater does not use a standing pilot light; instead, it uses a hot surface ignition or an intermittent pilot.
2. A condensing water heater
This water heater uses two heat exchangers, namely, the primary heat exchanger and the secondary exchangers. The gas is usually burned from the primary heat exchanger while the secondary exchanger draws heat from the exhaust. The secondary exchanger then cools the gas vapor until it turns to water.
When using this type of heater, you need to know whether it uses an intermittent pilot or a hot surface ignition. After finding out which ignition it uses, you can efficiently address the issues that may come your way.
Lighting an electronic ignition water heater
When lighting the heater, the pilot light will light or the gas to light directly.
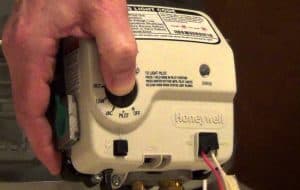
How to light a hot surface ignition;
- Find the igniter button first.
- After you locate the igniter button, press the button and hold it down
- Lastly, listen keenly for the click and the ignition.
With this, the igniter should directly light the gas. You should feel the heat from the unit to know that it is working.
How to light an intermittent pilot ignition;
- You need to locate the igniter button and knob first
- Switch the button to the pilot ignition
- After you are done, listen keenly for a click and an ignition
- Finally, switch on the knob after lighting.
When lighting the igniter, the knob should be in the pilot position and later turn on the knob after lighting.
Checking for loose wires
The igniter usually has multiple wires connecting to it, and the wires sometimes loosen. When the wires loosen, there might be a problem with the igniter getting power. Keenly inspect the wires, and in case you find any loose wire, resolve it tightly. If you are unable to, find a professional to attach them for you.
When working on a water heater, always make sure that it is unplugged and the gas is turned to the off position. In case you are unsure about your doings, call a professional immediately.
Correcting the voltage
Test the voltage going to the igniter using a Multimeter. If the voltage is too high, possibly above 125 VAC, it may cause a failure to your igniter. Nowadays, igniter water heaters usually have a control board in which it sends a code in case of any problem with the voltage. This control board uses blinking lights to help spot which code is being thrown.
If your igniter is not the very digital one, you need to check your manual to find the blinking lights and codes causing the problem to your igniter.
Replacing a damaged thermocouple
A thermocouple is used to detect the pilot flame. If it gets damaged or does not work correctly, the pilot will not light by pressing the igniter. With this, the thermocouple needs to be replaced or tightened if loose.
To test whether your thermocouple is damaged, a multimeter is needed. Unscrew the thermocouple from the control valve and then set the multimeter to read millivolts. If the thermocouple reads less than 25 millivolts, then the thermocouple is automatically bad and needs to be replaced.
Simple steps on how to replace a damaged thermocouple
1. Remove the cover panel
Turn off the heater’s gas control valve first, whether using a standing pilot or an electronic ignition. On the main gas supply pipe, close the shut-off valve. When using a standing pilot, take out the cover panel and find the burner assembly. If you have electronic ignition, remove the burner assembly manifold cover panel. Always start by removing the fasteners securing the manifold’s top plate.
These fasteners may be different depending on the manufacturer. They may be screws, nuts, or specialized fasteners. It would be best if you then took out the burner reservoir tube and to get the pilot tube, manifold, and the thermocouple circuitry out, gently push down the tube.
2. Disconnecting the control valve
Find an adjustable wrench that will help release the thermocouple connection from the control valve. Disconnect both the pilot supply tube and the main burner supply tube. If you have electronic ignition, the wire connected to the Piezo igniter should be removed.
3. Remove the thermocouple
When the burner assembly is out, remove the damaged thermocouple slowly from the mounting bracket and be careful not to damage any parts. Pull it through the grommet seal to completely remove it.
4. Mount the new thermocouple
This depends on the type of system that you are having. Place the thermocouple inside the mounting bracket and push it gently until it clicks. The pilot flame should cover about half an inch of the tip. Reinstall the burner assembly in the burner combustion chamber. An electronic ignition requires a gasket around the manifold top plate.
5. Connect the gas control
Reconnect the pilot and the burner supply tubes and the thermocouple to the gas control valve. In the case of electronic ignition, the Piezo igniter needs to be connected. Open the gas shut-off valve and switch on the gas control valve. If you have a standing pilot, light it first before turning on the gas control valve.
6. Checking for gas leakage
The best way is by using soap and water mixture. Cover all the fittings in the soapy mixture. In case of any bubbles, it shows that there is gas leakage.
There are sometimes when the control valve is faulty. At this point, you need a professional to replace the valve or to look at it. The valve should not be handled by someone who is not experienced.
Conclusion
When connecting various wires or ignitions, you should always be aware of the type you are using to avoid faulty connections, such as using an intermittent pilot system or a hot surface ignition. There are minor differences or additions when using the intermittent ignition that is not in the hot surface ignition.
Electronic ignition water heaters need to be handled with utmost care. If one is unaware of what they are doing, it is always advisable to contact a professional who can help in replacing the damaged tools or devices. To avoid safety issues, do not try lighting the heater manually. If the above troubleshooting steps do not help you out, do not hesitate to contact an expert.