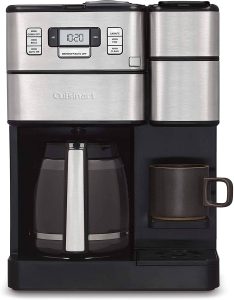
Cuisinart coffee makers can sometimes turn on but fail to start brewing even if it is turned on due to the clogging of the system. In this case, inspect your coffee-making machine if there are any damages. Most people consider throwing away the coffee machine that is not brewing instead of identifying the cause of the problem and trying troubleshooting it to make the coffee start brewing again.
Most of the time, your problem arises from poor cleaning of your coffee maker or not cleaning your coffee maker at all. Therefore, ensure that you frequently clean your machine to prevent clogging. Above all, ensure you follow your manufacturer’s instructions when trying to troubleshoot the problem.
Table of Contents
Steps on how to troubleshoot Cuisinart coffee maker that turns on but doesn’t brew
Minerals such as calcium can accumulate inside your coffee maker and clog the whole system from brewing your coffee even if your coffee maker is turned on. Calcium mineral accumulation is removed by using vinegar and hot water.
Step 1: Confirm if you plugged every coffee component as required
Check your coffee maker carefully to confirm if everything is placed correctly. If not, try plugging them correctly, and then try brewing your coffee.
Step 2: Turn off your coffee maker
Shut down your coffee maker and wait for it for around 30 minutes to sit. Try powering the coffee maker.
Step 3: Remove the coffee pot carefully
After turning on your coffee maker:
- Remove the coffee maker pot with the coffee maker on.
- Try checking the coffee pot if it is functioning as required. If you don’t sense any heat in the coffee pot, then your heating plate has been damaged and needs replacement.
- Ensure you remove the heating plate carefully while wearing oven gloves to avoid injuring your fingers and hands.
If you don’t sense any heat in the heating plate, try fixing it appropriately. First, check the power supply if it is connected properly. When power fails, the heating plate remains unheated, and therefore it is impossible to sense any heat.
Otherwise, power failure hinders your coffee maker from brewing your favorite coffee.
Moreover, consider inspecting the electrical connection between the heating pot and power supply if they correctly match. If they are not, you must replace your heating pot. After returning, try connecting your coffee maker again and test it using hot water.
Step 4: Clear all water in the coffee chamber
Remove all water inside the reservoir of the coffee chamber. After finishing the process of removing water, check all components of the reservoir if they are in good shape or require fixation. In case they are damaged, try fixing or replacing them. Ensure you replace the components with those described in the manufacturer’s instructions.
Step 5: Clean your coffee machine using water and vinegar
First, put vinegar into your coffee maker until it is halfway. Add hot water on top of the vinegar until the coffee chamber becomes full. Ensure that you don’t overflow the coffee chamber. Brew the coffee maker machine until it becomes empty.
Repeat the process until your coffee maker system is completely unlocked before you use it again.
Step 6: Run hot water without vinegar
Constantly add hot water into the coffee chamber and try brewing it until empty. Running hot water only helps in getting rid of vinegar that has been left in the system. Run a couple of cycles until your coffee maker is completely clean with no vinegar.
Test your coffee maker and see if it is brewing normally. If the problem persists, try consulting an electrician to guide you to know if the coffee maker is repairable or it needs a new replacement. Ensure you maintain your coffee maker system, especially by cleaning it constantly to prevent any issues from arising.
Frequent cleaning prolongs the lifespan of your coffee maker. Moreover, cleaning maintains your coffee maker and leaves it in good shape. Finally, regular cleaning of your coffee maker gives you the best and most accurate results when brewing coffee, and therefore your coffee won’t have a metallic taste.
Step 7: Consider replacing your Cuisinart coffee maker if the problem persists
After visiting an electrician and identifying if your coffee maker cannot be fixed, replace your coffee maker and ensure you maintain it according to the manufacturer’s instructions.
Other coffee maker problems require troubleshooting
Your coffee maker may also experience some problems apart from not brewing up and they need immediate fixation. The problems include:
1. Coffee maker lid leakages
A lid leakage is a common problem that results from a damaged or clogged lid. Once your lid is damaged or clogged, your coffee is spilled over the surface. To fix the problem, first, identify the cause of lid leakages.
If your coffee maker lid is broken, buy a new one from a licensed seller. Buy a lid that fits your coffee maker model, but if your coffee maker lid is clogged either by calcium or oil, you may require to wash the cover appropriately. First, soak the cover in boiling water and try washing it using vinegar. Rinse the lid using hot water severally until the lid is completely clean.
Fix the cleaned lid or bought lid and test if there is any leakage. Finally, ensure you clean your coffee maker frequently to prevent dirt and oil from accumulating on the lid, affecting the brewing process.
2. Coffee overflowing on the surface
Sometimes, you can get coffee overflowing on the surface while brewing. The problem mostly occurs when you overfill your coffee with coffee water. Ensure that you fill your coffee basket because overfilling may damage your Cuisinart coffee maker.
3. Cuisinart coffee grinder fails to function
Your coffee maker grinder may fail to function due to coffee beans stuck on the machine’s blade. First, to troubleshoot the problem, place the grinder in hot soapy water and try scrubbing it gently to get rid of all dirt, including coffee beans that have accumulated. After cleaning, try testing the grinder if it functions. If it fails, try replacing the grinder by buying a new one.
Conclusion
The guidelines above will help you troubleshoot your coffee maker even if it turns on but fails to brew your coffee. Furthermore, if you experience coffee overflows, you can also use the above instructions to bring your coffee back to functioning properly. Finally, you can enjoy your coffee every morning.