A film camera is efficient in taking pictures for memory reference. The camera may fail to function for several reasons: shutter button failing to respond, wrong shutter settings, among others. If your camera shutter becomes a fault, it is essential to fix the issue immediately.
The process of troubleshooting a fault camera shutter is easy. First, inspect the whole camera and identify any faults. Try fixing the issues depending on the root cause of the problem. Also, try adjusting the settings correctly.
The article below shows steps to follow when fixing a stuck shutter film camera. Also, it describes how to troubleshoot a fault camera shutter button that is malfunctioning. Ensure you follow the steps carefully to get accurate results.
Table of Contents
Steps how to fix a stuck shutter on a film camera
First, identify all the film camera accessories that drain power and turn them off correctly. For the following steps, you’ll need all of the batteries’ available charges. If your camera has picture stabilization, disable it.
Turn off the film camera flash. Position the film camera in a different recommended mode apart from the auto mode. Locate the LCD and switch the LCD off as well by pressing the DISP or DISPLAY button.
Step two: Select an option on the camera exposed for a more extended period using the film camera flash
The option will be shutter mode for many film cameras (for many film camera A models, the wheel with AUTO, M, Tv,…). The mode is also known as “Long Shutter Mode” on some Camera SD models.
Set the camera for the longest possible exposure, usually 15 seconds. Shutter priority mode isn’t available on all cameras (Tv). Instead, switch to manual mode and off the flash. Try the remedy in a gloomy room with these settings, opening the battery door immediately after snapping the photo.
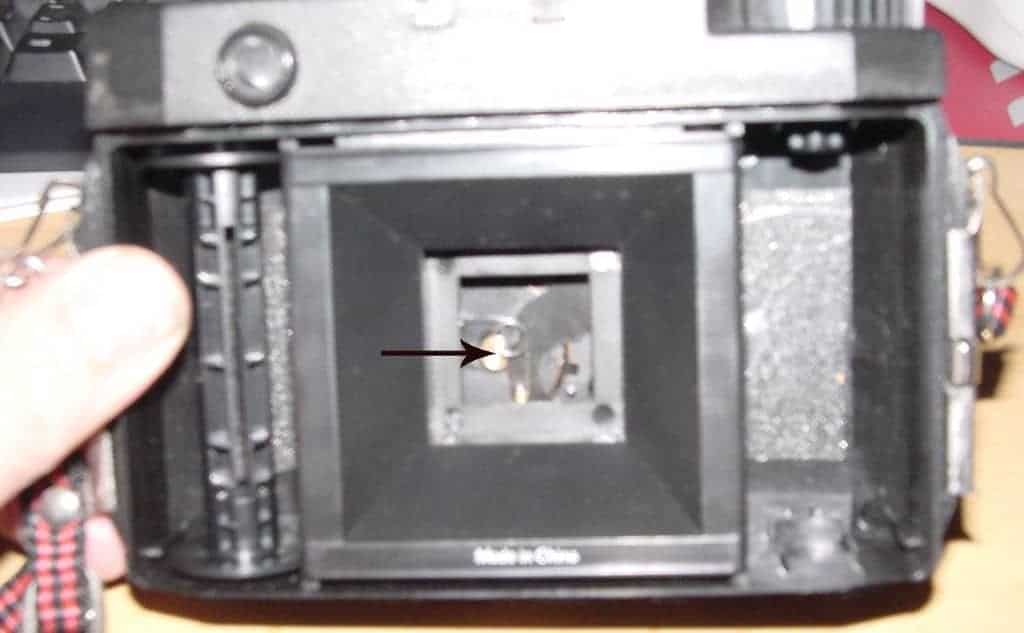
Step 3: Record the appearance of the film camera by taking a photograph
Before proceeding to open the battery door of the film camera, first, take a photograph of its appearance to help you make some references. Also, you may compare the picture with that of the manufacturer’s manual guide.
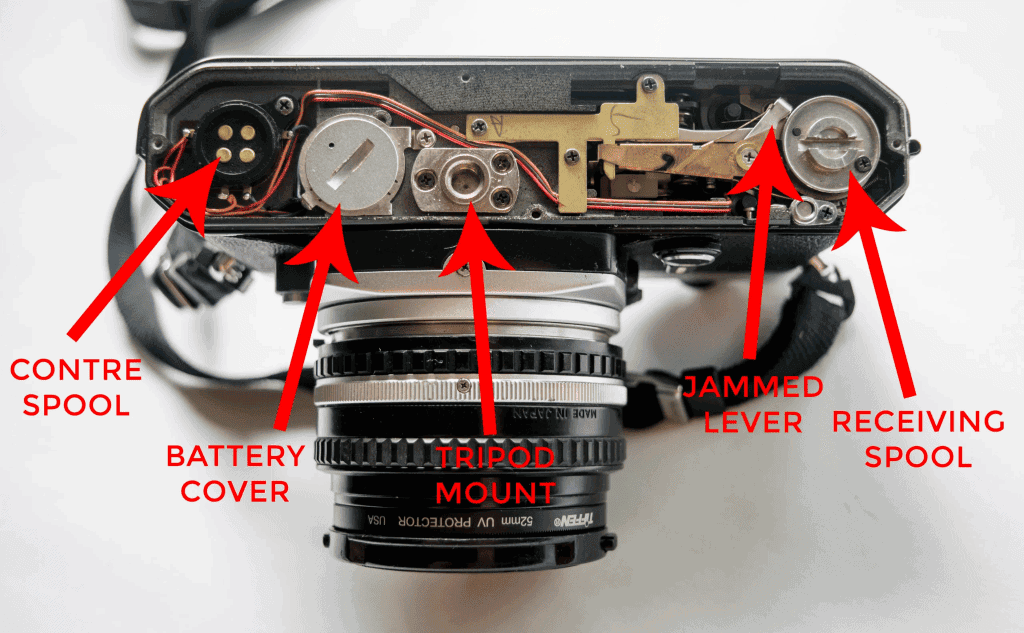
Step 4. Locate the position of the battery door and open it
First, find the position of the battery door. Gently, open the battery door and leave it open for some seconds, approximately 7 seconds. After 7 seconds, close the camera door again. The goal is to disrupt power for a brief period during the exposure.
If your camera isn’t capable of 15-second exposures, you can open the battery door immediately after hitting the shutter button. While opening the battery door, ensure the digicam is left on. After some time, close the battery door again carefully. Ensure you handle the film camera door carefully to keep it in good condition and prevent additional replacement costs.
Step 5: Redo the process until the shutter is no longer jammed
Redo the process many times, up to 20 times, until the shutter becomes unstick. According to a professional technician, a power outage while the film camera shutter opens the camera door “jog” opening the camera shutter.
Step 6. Alternative Solution 1 requires a lot of attention
If you decide to use this technique, please exercise caution and common sense, as there is a clear risk of distorting your film camera more. If the following six methods fail after multiple attempts, try tapping the film camera against a wooden surface to jolt the shutter open.
Step 7: Alternative solution 2
Most people use another approach of simply prolonging the film camera lens. Also, they tap the area around the prolonged camera lens lightly and gently using the recommended tool, either a pen or a pencil, if step 6 above concerns you.
Check into the barrel now and again to see whether you observe lens flutter when snapping a shot. If there aren’t any, keep tapping. Flick the camera’s lens carefully and record it by taking a camera.
Step 8: Turn on the iris part present in the film camera
Keep selecting the dial back and forth constantly from picture-taking mode to playback mode in a room with no light to turn on the camera iris. Switching between modes until the shutter opens is a continuous process. While doing these cycles, ensure you tap the film camera lens lightly using the recommended tool, either a pen or a pencil.
Step 9: Place the camera in shooting mode
After turning on the iris, position the camera in a recommended mode, preferably the shooting mode. Open and close the battery cover in a very dark room once more. If there is a shooting mode, you don’t need to set the time of exposure to 14 seconds or set the film camera in any TV mode.
Ensure any shooting mode is functioning as you open and close the camera door gently. Repeat this process until the shutter closes. Using a pencil or pen, gently tap on the lens housing between tries.
Step-by-step guide on how to troubleshoot a non-functioning film camera shutter
Sometimes, the film camera shutter may fail to function as usual due to many reasons such as wrong drive mode settings, incorrect insertion of the recording media, among others. Before troubleshooting the issue, check the following and ensure they are in good condition.
- First, scrutinize the battery to see if the battery is ultimately charged.
- Ensure you turn on the film camera device before carrying out any activity.
- Check to see if the mounting of the camera lens is correct.
- Check the camera settings and Set the Drive Mode to Normal instead of Self-Timer.
- If you are utilizing the built-in flash, make sure it’s fully charged before taking another picture.
- Suppose you’re going to use the Cont. Wait until the image data is written to the memory card before taking the next photo in shooting mode.
- Ensure you insert the recording media correctly to see if the issue is eliminated.
- Set the write-protect or lock switch to OFF or UNLOCK if the recording media has one.
If the problem persists after attempting the steps above, try the following:
- Turn your device off.
- Wait one minute after removing the battery pack.
- Turn your camera on.
- Check to see whether the problem has been resolved.
- If not, seek help from a professional technician to help you identify the leading cause of the problem and fix it. Also, consider replacing the film camera shutter button if this fails.
Frequently asked questions
How can I fix my camera shutter lag?
Because a rapid shutter is either built into the camera or isn’t shutter, lag isn’t always a camera problem that needs solving. The most straightforward approach to eliminating shutter lag is investing in a high-quality camera with a built-in quick shutter speed. If it fails, there are a couple of alternative options for reducing shutter lag:
- If at all feasible, shoot in good lighting.
- Whenever possible, try to place yourself so that any moving subject comes towards you rather than across your shot.
- Pre-focus your shot if possible. Focus your camera on a specific location and wait for the subject to enter the picture.
- Manual control and manual focus modes should be used when shooting.
Conclusion
A film camera is effective in shooting some photographs for future memory reference. Sometimes, the film camera shutter may fail to function, as usual, preventing one from taking pictures effectively. Luckily, the information above shows the best steps to follow to fix such issues.
Finally, when handling any film camera, ensure you consider the following; keep the camera in a good place, the camera bag, and repair the camera sooner. Also, ensure you take good care of the camera to increase its lifespan.